Pages

Showing posts with label cookies. Show all posts

Thursday, April 14, 2011

Oatmeal Raisin Cookies


oatmeal cookies

I miss Costco. (There isn’t one in Maine.) I miss a lot of things from Costco, but chief among them are the oatmeal raisin cookies that you can get from their bakery. Oh. My. Gosh. Even people who loathe oatmeal raisin cookies will gobble up the ones from Costco. They are THAT good.

When I found this recipe on Epicurious I had high hopes. It had four forks, that looked promising! Of course, I had to ditch the dates and walnuts, I don’t like things cluttering up my oatmeal cookies. So I boosted the amount of raisins. When they came out of the oven, SUCCESS! They taste JUST like the ones from Costco, only better because they’re fresh (of course) and made from ingredients you can actually pronounce.


little hands

Hey, Kid! I’m trying to take a picture here!

The other thing I like about these cookies is that they have lasting power. As in, these last few cookies have been kicking around my cookie jar for over a week now and they are still perfect! Cookies don’t usually last long enough for me to test out their shelf life, but we were sick last week ;) This recipe makes a lot, so do yourself a favor and bake up a batch for this weekend!


Oatmeal Raisin Cookies

Adapted from Epicurious


2 cups all-purpose flour

1 teaspoon baking powder

1 teaspoon ground cinnamon

1/2 teaspoon baking soda

1/2 teaspoon salt

3/4 cup (1 1/2 sticks) unsalted butter, room temperature

1/4 cup Crisco room temperature

1 cup sugar

1 cup (packed) dark brown sugar

1/4 cup honey

2 large eggs

1 tablespoon vanilla extract

3 cups old-fashioned oats

2 cups raisins


Preheat the oven to 350 degrees. Line your baking sheets with parchment paper.

In a medium bowl, whisk together the flour, baking soda and salt. Set aside.

In your mixer, beat together the butter and Crisco.

Add the sugars and beat until fluffy.

Add the eggshoney and vanilla and beat until well combined.

Add the flour mixture and mix until incorporated.

Stir in the oatmeal and raisins. Mix until well combined.

Drop by tablespoonfuls onto baking sheets.

Bake for 10 minutes, then let the cookies cool on the sheet for 10 minutes before removing them to a wire rack.

Clear the immediate vicinity of poaching toddlers (distract them with their own cookies!), pour yourself a nice, tall glass of milk and enjoy!

Wednesday, March 30, 2011

Not Oreos


chocolate sandwich cookies

These are not Oreos. These are better than Oreos. Oreos are very good in their own way, there’s still nothing like pulling one apart, licking out the vanilla center, putting the wafers back together and dunking them in milk. But sometimes that vanilla frosting in the center leaves a funny film on the roof of your mouth and then you usually have to go brush your teeth immediately afterwards or risk having little specks of black wafer lurking, just waiting to wedge themselves between your front teeth and embarrass the heck out of you.

These cookies don’t want to embarrass you. And, while a tall, icy glass of milk is a perfect complement to these cookies, they don’t need it to camouflage the store-bought taste of them. Because they’re not Oreos. They are Homemade Chocolate Sandwich Cookies.

You’ll want to make these today. Really. Truly. Today.

Chocolate Sandwich Cookies

Adapted from Smitten Kitchen

For the chocolate wafers:

1/2 cup plus 2 tablespoons butter, at room temperature

1 1/2 cups sugar

1 large egg

1 1/4 cups all-purpose flour

1/2 cup cocoa powder (You know how much I love King Arthur’s.)

1 teaspoon baking soda

1/4 teaspoon baking powder

1/4 teaspoon salt


For the filling:

4 tablespoons butter, at room temperature

1/4 cup shortening

2 cups sifted confectioners sugar

2 teaspoons vanilla extract


Preheat the oven to 375 degrees. Set out 3 baking sheets.

In your mixer, beat the butter and sugar until light and fluffy.

Add the egg and mix well.

In a medium bowl, combine the flour, cocoa powder, baking soda, baking powder and salt.

Add to the batter and mix very well.

Drop by tablespoonsful onto the cookie sheets, 12 to a sheet. Dampen your hand with a little water and press down slightly on each ball of cookie dough.

Bake for 10 minutes. Remove to cooling racks.

While they’re cooling, make the filling!

In your mixer’s bowl, beat the butter and shortening together until well incorporated.

Add the vanilla and mix well.

Sift in (using a mesh sieve, for Heaven’s sake, not an obnoxious, old fashioned sifter!)  the powdered sugar and mix to combine.

Scoop the frosting into a pastry bag and pipe onto the underside of a cookie. Place another cookie on top and press lightly to seal them together. Lather, rinse, repeat.

Serve to your newly turned six year old, alongside a tall, icy glass of milk, and hear all about how he gets to marry the princess the next day at recess, but only if he can save her from the robots and swamp monsters.

Thursday, September 23, 2010

Mexican Chocolate Cookies

Mexican Chocolate Cookies2
These have been some of my favorite cookies for a long, long time. They have cayenne and black pepper in them, which, I’ll admit, does sound weird, but it gives them a wonderful, warm depth. When I make these especially for men, I always double the amounts of the peppers. They go nuts for them! It is a tad early to be thinking about Christmas, but they nicely round out a tray of assorted cookies, if you’re into that sort of thing! (Which I always am!)

Mexican Spice Cookies a.k.a. MAN Cookies
For my dear, late friend, Nick. I wish I could make these for you again.

6 tablespoons butter, softened
1/2 cup +1 tablespoon brown sugar
1/2 + 1 tablespoon sugar
1 cup flour
1/2 cup + 1 tablespoon cocoa powder
1/4 teaspoon baking soda
1/4 teaspoon salt
1/2 teaspoon cinnamon
generous pinch CAYENNE pepper
generous pinch ground black pepper
1 teaspoon vanilla
1 egg
1 cup semi sweet chocolate chips
Frosty cups of ICE-COLD milk, for serving

Preheat the oven to 325 degrees. Prepare your baking sheets with parchment paper and set aside.
Cream together the butter, brown sugar and sugar.
Add the egg and vanilla and mix well.
In a medium bowl, whisk together the flour, cocoa powder, baking soda, salt, cinnamon, cayenne pepper, and black pepper.
Add the flour mixture to the butter mixture and beat until well incorporated.
Stir in the chocolate chips.
Pop the dough into the fridge for 30 minutes to chill.
Drop by rounded teaspoonsful onto the baking sheet, 12 per sheet. Smash the balls of dough fairly flat, they won’t really spread out on their own.
Bake for about 12 minutes or until the cookies are just set, but NOT HARD! Let them finish cooking for two minutes on the tray and then remove to cooling racks.
Serve with ice-cold milk and enjoy!

Gentle reminder:
Today is the last day to enter the King Arthur Giveaway!
Please leave a comment on this post to enter before 11:59pm!

Tuesday, September 21, 2010

How Long Until the Bus Arrives???

911 cookies


I really enjoy having a kindergartener. He gives me an excuse to make lots and lots of cookies! (Like I needed an excuse!) He’s been in school for three weeks now and every day when he gets off the bus he comes in the house and has cookies and milk with Amelia and they discuss their respective days. It is the cutest thing EVER! I really need to get a picture of them. *makes mental note*

Anywho, this cookie was a huge hit with them. And with Jay. And with Jilly. And with me! Just a huge hit all around. It’s got a laundry list of ingredients, but this is definitely a cookie you should tackle! It’s from Diane Mott Davidson’s The Grilling Season, which is a murder mystery not a guide to grilling outdoors. It’s a great read, like all her other books.

And, of course, this cookie will be made that much better by using King Arthur Flour’s Bensdorp cocoa powder instead of the Schmershey variety. Just sayin’. Okay. . . . on to the cookies!


Chocolate Comfort Cookies

Adapted from Diane Mott Davidson’s The Grilling Season

1 cup chopped hazelnuts

2 cups semisweet chocolate chips

1/2 cup dried tart cherries

1 cup (2 sticks) butter, softened

3 oz. cream cheese, softened

1 cup sugar

1 egg

2 tablespoons milk

2 ounces unsweetened chocolate, melted (I just used part of an 85% cacao LIndt bar I had hanging around.)

1 1/2 teaspoons vanilla

2 cups+2 tablespoons flour

1/2 teaspoon baking powder

1/2 teaspoon salt

1/4 cup Bensdorp cocoa powder

1 cup marshmallow cream


Preheat the oven to 325. Line your cookie sheets with parchment and set aside.

On another baking sheet, spread the hazelnuts. Toast in the oven for 7-12 minutes until they are lightly browned and some skins have loosened. Set aside to cool.

In a medium bowl, sift together the flour, baking powder, salt and cocoa.

In a large bowl, combine the chips, cherries and cooled nuts.

In your mixer’s bowl, combine the butter, cream cheese and sugar. Beat well.

Add the egg and mix until creamy and smooth.

Add the milk, melted chocolate and vanilla. Mix until well incorporated.

Add the flour mixture to the batter. Mix in the marshmallow cream.

Stir in the fruit mixture and mix until well combined.

Scoop rounded teaspoons of dough onto the cookie sheet, 12 to a sheet.

Bake 10-15 minutes until they are puffed and set, then remove from the oven and let cool on the tray for another 2 minutes. Then remove to a wire cooling rack.

Lather, rinse, repeat with the remaining dough.

Enjoy with hot chocolate or a glass of ice-cold milk!

Makes a bazillion cookies. Or thereabouts.


Just a friendly reminder:

To enter to win a pound of Bensdorp cocoa powder and a box of unbleached cake flour from King Arthur Flour, just go to this post and leave a comment!

Easy peasy!

Tuesday, August 31, 2010

Kindergarten Cookies

1

Yesterday was Reese’s first day of kindergarten! I wanted to have some nice, warm cookies waiting for him when he got home, so I got started on one of my favorite cookie recipes. But when I went to my baking pantry, I found it bare. You see, while my mom was here visiting we baked up a storm. I think we made a treat just about every day! And I haven’t been to the grocery yet to replenish my cupboards. I was out of EVERYTHING, which, if you know my ingredient hoarding habits is really saying a lot! I don’t feel safe unless I have a stockpile of chocolate and baking stuff. I was out of powdered sugar, Pam, dried cherries, dark chocolate chips, semi-sweet chocolate chips, almonds, yeast. . . the list goes on and on! I’m going to have to raid the entire baking aisle when I finally get to the store!

2

So, since I was out of pretty much all the extras that go into these cookies (and only barely had enough of the base ingredients!), I’m going to rename them Kindergarten Cookies. That’s the great thing about this recipe, it’s wonderfully adaptable. You could also call them Kitchen Sink Cookies! The original recipe (which came from a Diane Mott Davidson murder mystery) calls for dried tart cherries, almonds and two kinds of chocolate. (And it is divine.)  I used cranberries, walnuts, a scant bit of semi-sweet that I had left, bits and bobs of dark and milk chocolate bars I had lying around, and white chocolate, and they were just wonderful!

3 

Also, this recipe makes about a bazillion cookies. It calls for 3 pounds of extras aside from the base batter itself! So it’s a great recipe to portion half of it out and freeze the little balls of unbaked dough because you’ll still end up with 3 dozen or so freshly baked cookies. Then, anytime you want a snack you can pop however many you want out onto a baking sheet, bake ‘em up and have warm, gooey cookies with no effort!

4


Kindergarten Cookies

Adapted from Chocolate Coma Cookies in Diane Mott Davidson’s Tough Cookie

(The original ingredients are in parentheses)

1 cup walnuts, chopped (1 cup blanched silvered almonds)

4 oz. white chocolate (4 oz. bittersweet chocolate, chopped (Godiva Dark, Lindt bittersweet))

1 cup dried cranberries (1 cup dried tart cherries)

 12 oz. assorted bits and bobs of dark, milk and semi-sweet chocolate, chopped (12 oz. semisweet chocolate chips)

2 cups rolled oats

2 cups flour

1 teaspoon baking powder

1 teaspoon baking soda

½ teaspoon salt

½ lb. unsalted butter, softened

1 cup packed brown sugar

1 cup granulated sugar

2 eggs

1 ½ teaspoon vanilla extract

 5


Preheat oven to 350.

Chop chocolate into small chunks and set aside.

In a large bowl, combine dried fruit, chocolate, nuts, and oats, and set aside.

In a medium bowl, sift together flour, baking powder, baking soda, and salt and set aside.

In your mixer’s bowl, beat butter until creamy.

Add sugar and brown sugar and beat until light and fluffy.

Add eggs and vanilla and beat until well combined.

Add the flour mixture, and beat at low speed until well combined.

Add chocolate mixture. Mix on low until incorporated.

Drop in 1 tablespoon balls on baking sheet, about 12 per sheet.

Bake 12-14 minutes* or until cookies have set and are slightly flattened and light brown. Cool on sheet for 2 min, then transfer to rack.

Enjoy!

*Note: I like to bake my cookies for about 10 minutes or until they are juuuuust set and let them finish on the hot sheet out of the oven. I think it makes them softer and chewier, but feel free bake them all in one go if that’s not how you like them!


 6


P.S. Do you read Diane Mott Davidson? I love her mystery series! There are 15 books in all and of course, I have all of them.  It’s about a caterer in Colorado who solves local crimes, while cooking up a storm! And the books all have recipes in them. I need to try more of them out, the ones I have done are ALL keepers! I really should have mentioned them at the beginning of the season because they make great summer reading!

 7

P.S.S. Yum. Yum, yum, yum, yum, yum! Yum!

Thursday, June 24, 2010

Raspberry Lemon Bars

Lemon raspberry bars

This is the best lemon bar you will ever make. Bold statement, right? But I’m confident that you’ll agree. Oh my GOSH, these are AMAZING!!! I was craving lemon bars and did a search in my Google Reader (that is one of my favorite features! Use it ALL the time!) and found this one. Which I found kind of amusing because it wasn’t the source I was expecting. I thought for sure I’d end up with a Pioneer Woman recipe or one from Marie at The English Kitchen!  I had planned to make it exactly as her recipe but when I got to the part where I needed to get my frozen blueberries out of the freezer, well, I was out. I always have a lot of frozen berries on hand (which was why I didn’t even bother to check how many blueberries I had!) so I swapped the blueberries for raspberries. Now I’m not at all sure I’ll ever try them with the original blueberries! The tart bite you get from the frozen raspberries is sooooooo goooooooood combined with the tartness from the lemon. Amazing!

I also add more lemon zest and juice that the recipe called for. Trust me. These bars are just perfectly tart, almost on the cusp of being too tart (but in the best way possible!) Without further ado. . . .

Lemon Raspberry Bars

Adapted from Beth at The Stories of A to Z

Crust: 2 cups of flour

1/2 cup of sugar

pinch of salt

zest of one lemon

3/4 cup (1 1/2 sticks) butter, cut into pieces and chilled

Topping: 1 1/2 cups of sugar

1/4 cup flour

1/2 teaspoon baking powder

1/4 teaspoon salt

4 eggs

zest of one lemon

1/3 cup freshly squeezed lemon juice

1 1/2 cups frozen raspberries

Powdered sugar for garnish


Preheat your oven to 350 degrees.

Line a 9x13” pan with parchment paper. (If you place one strip going lengthwise and one going the other way you’ll get nice ‘handles’ to pull the finished bars right up out of the pan. Just like I do for brownies. It makes it so much easier to cut them!)

To make the crust: combine the flour, sugar, salt and lemon zest in the bowl of your food processor. Pulse to combine.

Add the chilled butter and pulse until the mixture resembles coarse crumbs.

Pour the mixture into the prepared pan and smoosh it around so you have a nice, tight, even layer.

Bake for 20 minutes, or until the edges are lightly browned.

Meanwhile, in a large bowl, make the filling. Combine sugar, flour, baking powder, salt, eggs, and lemon zest and juice and whisk well.

Fold in the raspberries.    

Pour filling into the prepared crust.

Bake for 25-30 minutes or until the filling is set.

Cool completely on a cooling rack, then use the parchment paper ‘handles’ to pull the bars from the pan.

Use a sharp knife to cut the bars into small squares (if you want them to be easy to pick up) or large squares. (if you want to serve them on a plate as a dessert.)

Dust with powered sugar and enjoy!

Wednesday, March 10, 2010

Mama’s Little Baby Loves Shortnin’ bread!


I know. Shortnin’ bread is a fried batter bread, the ingredients of which include corn meal, flour, hot water, eggs, baking powder, milk and shortening. (Well, I didn’t know that until Wikipedia told me.) And this post is about shortbread cookies. Not the same thing at all. So sue me. :)

Shortbread with buttercream

About halfway between Moses Lake (where we lived) and Seattle there is this wonderful place called Thorp’s. The top two floors are chock full of antiques. (SO fun!) The bottom floor has wonderful local produce and lots of specialty food items. Like the most delicious sour cherry preserve I’ve ever tasted. And some really terrific lemon shortbread cookies. They aren’t cheap, two palm sized cookies for $4. $4!!!! But they’re wonderful. I made the trip over to Seattle every month (at least) during my last pregnancy, and I’d almost always get those cookies. And as I drove away I’d think to myself . . .

Me: you dolt. You can bake! Why aren’t you baking your own shortbread, instead of paying through the nose for theirs?

I: Yeah! They’re just shortbread and a lemon glaze!

Me: Well, why don’t you make a batch when we get home?

I: Okay! I’ll make my own when we get home! Then I can have these whenever I want! I can even freeze the dough and keep it on hand!

Me: We’ll see. . . .

Um, yeah. Only after I had my baby and didn’t have to make the monthly trip to Seattle did I finally get off my kiester and make my own shortbread. I’ve been racking my brain to recall where I found this recipe, but I can’t remember. Anyhow, it’s the best. It makes the most fantastic shortbread. Which is what I now make when the kids want to decorate cookies! The dough is sturdier, and tastier, than regular sugar cookies, and the cookies bake up to be much firmer. So they won’t snap into a thousand pieces when eager little hands try to smear a cup of frosting on top! My favorite combination is a vanilla shortbread with lemon glaze, but this recipe lends itself to a plethora of combinations. Add ginger, clove and cinnamon and top with lemon frosting for a yummy gingerbread flavor. Or substitute butter flavoring (the only application I’ve ever found for that bottle that I don’t remember how I came by!) for the vanilla and smear Nutella on top. OMGravy. Peppermint extract in the cookies and a vanilla glaze with crushed candy canes sprinkled over the top makes them perfect for Christmas. The latest incarnation was almond extract and raspberry buttercream. Mmmmmmm. So, I’ll leave you with the base recipe and the lemon glaze I like with it, and you can tweak it to your heart’s content!

shortbread

Perfect Shortbread with Lemon Glaze

3 sticks unsalted butter, at room temperature

1 cup sugar

1 teaspoon vanilla extract

3 1/2 cups flour

1/4 teaspoon of salt


In a mixer bowl, combine the sugar and the butter and beat until light and fluffy.

Add the vanilla extract and mix to incorporate.

In a medium bowl, whisk together the flour and salt.

Add the flour mixture to the butter mixture and slowly mix to combine.

Lay a piece of plastic wrap on the counter and dump the dough onto it.

Shape it into a flat disk and wrap tightly.

Chill the dough for at least 30 minutes.

Preheat the oven to 350 degrees.

Roll the dough out (I use a silicone mat, but you could just lightly dust a countertop with flour) to 1/2 inch thickness.

Cut out with whatever cookie cutter your heart desires. Alternately, you could just use a knife and cut into squares or rectangles. Or triangles. Or octagons. Or octopi. Or orangutans. Or ostriches. You get the idea.

Place cookies on baking sheet lined with parchment paper or a silicone mat.

Bake for 10-15 minutes or until the cookies are set and juuuuust starting to get a little color. Not brown. Usually 10 minutes for small cookies and 13 minutes for palm sized cookies. I just hover over the first batch and then I have a reference for subsequent ones.

When the cookies are cool; dip in chocolate, frost or drizzle with glaze.


Lemon Glaze

1 1/2 cups powdered sugar

zest and juice from one medium sized lemon (about 3 tablespoons of juice)

With a mesh sieve, sift the sugar into a bowl.

Add the zest and juice and whisk to combine.

Let the glaze set for about 2 hours before attempting to stack cookies. Even then I like to insert little squares of parchment paper in between them so they don’t stick together. Just wipe down the paper you used to bake them with and cut that up into squares. Reduce, reuse, recycle! Thanks, Bob the Builder.

Note: In our house, we prefer buttercream to royal icing for our decorated cookies. To store them, I just stack them on a cake plate with parchment or wax paper layered between them. Then I cover the whole thing with saran wrap. 


Oh, I wanted to show you something. This is what inspired me to get baking the other day, I went from this method of getting my kitchen clean (please excuse the miscellaneous crap all over the place.) . . . . 


sink

to THIS!!!!!!

dishwasher

Jay is planning on building a little panel to go in that excess space to the left of the BRAND, SPANKING NEW DISHWASHER!!!!! I have the most awesome landlord! I was in love with this house but a little skittish about living without a dishwasher so he had one installed for us!!!! Seriously, how awesome is that??? Anywho, as soon as it was installed I had an urgent desire to dirty up some dishes, so Amelia and I made those cookies :)

Wednesday, November 4, 2009

You NEED These in Your Life!


I’ve been holding off from making and posting pumpkin recipes this year. I don’t know why, just being rebellious I guess! Also, I knew that as soon as I started I wouldn’t be able to stop. Partially because I’m extremely fond of pumpkin and partially because you can never use up that darn can of pumpkin! You make something and have 2/3 of a cup left, so you make something else and have to open another can so you’ll have a full cup of pumpkin. And so on and so on and so on. Someday I’ll find the perfect combination of recipes that together use exactly ONE can. Until then I’ll continue to suffer through running the gauntlet of pumpkiny treats every fall!

I don’t remember where I got this recipe. I’ve been making it since I was sixteen and have adapted it several times. It makes the most delicious, slightly cakey, spicy little confections! The macadamia nuts in here are almost orgasmic, I kid you not. Yuuuuuuummmmmmmmmmmmmyyyyyyyyyyy!

cookies

Pumpkin Cookies with Macadamia Nuts and White Chocolate

dry ingredients

Whisk together 2 cups of flour, 1 teaspoon of baking soda, 1/2 teaspoon salt, 2 teaspoons cinnamon, and 1/2 teaspoon ground cloves.

whisked

All whisked up!

sugars

Combine 1/2 cup of sugar and 1/2 cup of brown sugar with a fork.

butter and sugars

Cream the butter and sugars together until nice and fluffy.

creamed

Like so.

add egg, punkin, vanilla

Add an egg, one cup pumpkin puree, and 2 teaspoons vanilla.

add flour

Mix well, then sloooooooowly add the flour mixture.

nuts

Roughly chop 2/3 cup macadamia nuts. Now, I say roughly chop, but really, I’m quartering these buggers. It takes a minute, but if you just have at them with a knife you’ll end up with these tiny little scrapings of nut. And then you’ll miss out on biting into a big, soft-but-still-crunchy, orgasmic nuts in the cookie. Also, I’ve used roasted, salted and roasted, and not roasted nuts in this. They’re all good, but I do like the salted and roasted ones. Yum!


add bits

Add the nuts and 2 cups of white chocolate chips.

mixed

Scrape down the bowl and mix well.

dollop

Dollop onto a cookie sheet. Don’t be an idiot like me and forget the parchment paper. All the bits and pieces of the cookies on this tray stuck and someone had to eat them.

baked

Bake at 350 degrees for about 10 minutes. You want them to be set, but not brown. Leave them on the sheet for 5ish minutes and then remove to a cookie cooler. That’s the secret, don’t brown them. Like the third one on the top row. And the third one in the second row, and the fourth one in the second row. Someone had to eat those ones too.  

    gettin it on     

Woops, those two are getting busy. Someone had to eat them too. Can’t leave them sitting around setting a bad example!

cookies


Pumpkin Cookies with Macadamia Nuts

2 cups flour

2 teaspoons ground cinnamon

1/2 teaspoon ground cloves

1 teaspoon baking soda

1/2 teaspoon salt

1 cup butter, at room temperature

½ cup sugar

½ cup packed brown sugar

1 cup pumpkin puree

1 large egg, at room temperature

2 teaspoons vanilla

2 cups white chocolate chips

2/3 cup coarsely chopped macadamia nuts


Preheat oven to 350.

Combine flour, baking soda, salt, cinnamon and clove in small bowl.

Beat butter and sugars in mixer until creamy.

Mix in pumpkin, egg and vanilla.

Gradually beat in flour mixture.

Stir in white chocolate chips and nuts.

Drop by rounded teaspoon onto greased baking sheets.

Bake for 10 minutes or until centers are set.

Cool on baking sheets for 5 minutes, then remove to wire racks.


Oh, funny story. . . I was putting the cookies onto the cookie cooler when Reese came up to see what I was doing. A nut from one of the cookies had stuck to the tray and left a hole in the cookie. Reese saw that poor cookie and said, ‘Ooops. This one has a hole, I’d better eat it.’ That’s my boy!!!!

Also, quick update on the mouse. I TOTALLY got Marie with the mouse in the ham salad! HA! Since then I got both Jay and Marie with it stuffed into the open end of a loaf of ciabatta, and the mouse made an appearance on the black keyboard of my father-in-law’s computer. Hee hee hee, it’s fun seeing where it pops up next!

Wednesday, October 21, 2009

Best Chocolate Chip Cookies EVER!!!

chocolate chippers

I saw these cookies on Bake at 350 and couldn’t wait to make them. Well, actually, I could. The way Bridget raved about them made me really want to hold out until I could get my hands on some decent chocolate and some sea salt. I was going to be making a trip to Seattle shortly, so I held off until then. When I got back I went into the kitchen to make them and remembered that they needed to spend a day in the fridge before you bake them. DARN IT! I had soooooo been craving them! So I made the dough anyway (a good portion of it never actually made it to the oven) and the next day, before I’d even started breakfast, got them into the oven.

They were worth the wait. Seriously. I now feel like I want to sprinkle salt over every cookie I ever bake again. YUM!!!! So, you can’t have these today, but if you get up right now and make the dough you can eat them for breakfast tomorrow, just like me!

By the way, Orangette (Sorry, don’t know her actual name!) recommends using your kitchen scale to make these, and so do I!!! With the odd amounts involved, my scale made putting this recipe together a breeze. Also, you’ve got to go check out all the recipe’s on Orangette’s site. She’s awesome! Everything I’ve tried of hers turns out beautifully!!!

Chocolate Chip Cookies

Adapted from Orangette

2 cups minus 2 Tbsp. (8 ½ oz.) cake flour

1 2/3 cups (8 ½ oz.) bread flour

1 ¼ tsp. baking soda

1 ½ tsp. baking powder

1 ½ tsp. kosher salt

2 ½ sticks (10 oz.) unsalted butter, softened

1 ¼ cups (10 oz.) light brown sugar

1 cup plus 2 Tbsp. (8 oz.) granulated sugar

2 large eggs

2 tsp. vanilla extract

1 ¼ pounds bittersweet chocolate chips or chunks, preferably about 60% cacao content, such as Ghirardelli

Sea salt, for sprinkling


Combine flours, baking soda, baking powder, and salt in a bowl. Whisk well; then set aside.

Using a mixer fitted with paddle attachment, cream butter and sugars until very light and fluffy, about 3 to 5 minutes.

Add the eggs, one at a time, mixing well after each addition.

Mix in the vanilla. Scrape down the sides of the bowl with a rubber spatula as needed.

Reduce the mixer speed to low; then add dry ingredients, and mix until just combined.

Add the chocolate chips, and mix briefly to incorporate.

Press plastic wrap against the dough, and refrigerate for 24 to 36 hours. The dough may be used in batches, and can be refrigerated for up to 72 hours.

When you’re ready to bake, preheat oven to 350°F. Remove the bowl of dough from the refrigerator, and allow it to soften slightly. Line a baking sheet with parchment paper or a nonstick baking mat.

Scoop rounded tablespoonsful of dough onto the baking sheet, leaving at least 2 inches between cookies.

Sprinkle lightly with sea salt, and bake until golden brown but still soft, 10-15 minutes.

Transfer the baking sheet to a wire rack for 5 minutes, then transfer the cookies onto the rack to cool a bit more.

Repeat with remaining dough.

Friday, September 11, 2009

I’ve Been Makin’ Whoopie


with this guy. . . . . . 

whoopie

I saw Gesine’s recipe for Whoopie Pies the other day and immediately stood up and removed butter from my fridge. I’m suggestible like that. The only changes I made were to use dark chocolate (because I didn’t have a good bittersweet one around!) and then when I tasted the cookie they were so rich (and delicious!) I decided to go with a less sweet cream cheese frosting instead of the 7 minute one she suggests. They were terrific! 

Whoopie Pies
 

3 cups all purpose flour

1 teaspoon salt

1 tablespoon baking powder

1 ½ cups unsweetened cocoa powder

2 sticks unsalted butter (room temperature)

2 cups sugar

2 eggs

1 teaspoon vanilla

1 ¼ cups non-fat buttermilk

¾ cup hot water

2 ounces bittersweet premium baking bar, cut into small pieces and melted in the water. (I used dark chocolate)

2 cups Ghirardelli's semi-sweet MINI chips

Preheat oven to 375 degrees.

Whisk together flour, cocoa powder, baking powder and salt in a large bowl and set aside.

Add chocolate to the hot water and set aside for it to melt.

In the bowl of an electric mixer, cream butter and sugar until light and fluffy.  

Scrape down bowl and add eggs one at a time, mixing until fully incorporated.

Combine buttermilk and chocolate mixture and alternate this mixture with the flour mixture until all elements are incorporated.  

Whisk quickly on high to insure perfect distribution.

Stir in the mini chocolate chips.

On a parchment lined cookie sheet and using a large ice cream or cookie scoop, place cookies onto parchment lined baking pans, 12 per pan.  

Bake for 15 minutes or until the cake springs back when gently touched.

Pipe a generous dollop of frosting onto half the Whoopies and sandwich with the remaining cookies.  These will keep up to 2 days in an airtight container.
 
Cream Cheese Frosting

2 sticks of butter, room temperature

8 ounces of cream cheese, room temperature

4-6 cups of powdered sugar, sifted

1 teaspoon almond extract

1 tablespoon of vanilla

In the bowl of your mixer, beat the butter and cream cheese together. 

Sift in the sugar and mix on low until incorporated.

Add the vanilla and almond and mix well.

Sunday, August 30, 2009

Pre-Made Our Way: Granola Bars

I love making my own stuff! Bread, yogurt, pancake mix, even cheese once! This fun challenge is hosted by Natalie at Oven Love, and comes at just the right time. Make your own granola bars! We are going to a big camping event and I was just getting around to thinking about the food for that weekend. These will make a perfect snack! Natalie shared some links when she posted this challenge and I followed those to this wonderful bar from Kristin at The Kitchen Sink Recipes. Man, does she have some gorgeous recipes there! I'll be making this and this in the very near future. YUM!

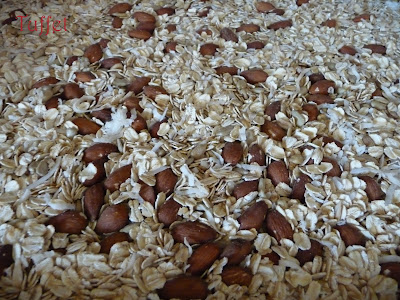
Nuts and seeds waiting to be toasted. Pretty, huh!

Syrup ingredients waiting to get melty.

Mmmmm, smells wonderful!

Prep square pan with parchment.

10 minutes later, all toasted.

Into the bowl along with the fruit. I went with tart cherries, yum!

Pour in the syrup.

Stir with a wooden spoon. For, like, 100 years. It will come together eventually!

Dump into pan.

Tamp down with a measuring cup. This part was fun :)

Bake for 30 minutes.

Let cool for evvvvvvver. Really. 2+ hours.

Cut up into bars. Lots of bits fell off the bars. Yummy bits. Somebody had to eat them!

Sponge Bob. Sponge Bob ate them.

The rhino smelled something wonderful and came to investigate.

Seriously, these bars will draw a crowd!


Granola Bars
Adapted from Kristin at The Kitchen Sink Recipes


2 1/2 cups rolled oats

1/2 cup shredded coconut

1/2 cup sunflower seeds
1/4 cup flax seeds

1/4 cup sesame seeds

1 cup whole almonds
1 teaspoon kosher salt

1 teaspoon cinnamon
1 teaspoon vanilla

1/4 cup honey

1/4 cup brown sugar

1/4 cup peanut butter (I used chunky)
1 cup dried tart cherries


Preheat the oven to
325 degrees.
Line a sheet pan and an 8x8" pan with parchment. (Make 'handles' on the 8" pan)

On the sheet pan, combine the
oats, coconut, seeds and almonds.
Toast in the oven for
15 minutes.
Meanwhile, in a medium pan over medium heat, combine
salt, cinnamon, vanilla, honey, brown sugar, and peanut butter.
Keep warm after sugar has dissolved.

Transfer toasted
seed and nut mixture to a large bowl.
Add
cherries.
Pour sugar mixture over
nuts and cherries and mix well.
Pack into 8" pan with the back of a measuring cup.

Bake for 30 minutes.
Remove from oven and let
cool completely on a wire rack.
Use the parchment 'handles' to remove granola to a cutting board.

Using a long, sharp knife, cut into 1" bars.
Cut the bars in half.

Store in airtight container.

Hide from roaming Ninja Turtles.